05 Bio-Sand Filter Pot – Making Mould Rings
Although the mud mould for a filter pot can be made with hand-made mud rings or even with mud bricks, it is easier if you have a set of mould rings. This article shows how you can make a set.
Strip-Ring : the cheap and easy method:
The simplest way of making a mould ring is using a strip of plastic or cloth or sacking. Cut a strip 6 inches (15cm) wide and about 4 feet (120cm) long. Fold the ends of the strip together and fix the ends to the side of a stick like this:
Some ways you could fix the strip to the stick:
- Drawing-pins.
- Small nails.
- Insert into a slot or split in the stick.
- Bind with thin string or strong thread.
Using the strip-ring
Insert the end of the stick into the ground so the bottom of the strip is level with the ground.
Wrap the folded strip round the stick until it is 20 ½ inches (52cm) long
Open the strip into a circle and fill with mud to make the largest ring, 13inches across.
For the full set of rings, the length of the strip before opening into a circle should be:
20 ½ inches (52cm)
19 ½ inches (50cm)
18 inches (47cm)
17 inches (44cm)
16 ½ inches (42cm)
16 inches (40cm)
If the mud is stiff enough, you can remove the strip-ring and make your next mud mould.
Another method is to cut a strip from a plastic drum. You can then tie a string or rope round it to hold it to the correct diameter for each mud-ring.
Metal-Ring : the durable method:
Materials required:
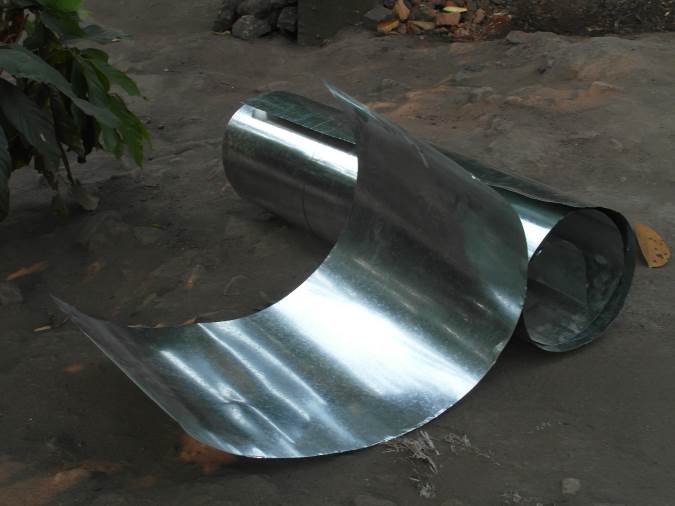
- Roll of thin galvanised steel sheet, at least 38 inches wide and 44 inches long.
- Tin Snips
- Hammer
- Tape Measure.
- Felt marking pen
- One masonry nail (e.g. roofing nail).
- One 4”-6” round wire nail, 3mm dia.
- Thick (3mm dia) aluminium or copper wire (e.g. aluminium coat hanger) or 24 no. 3mm dia rivets.
Making the Rings
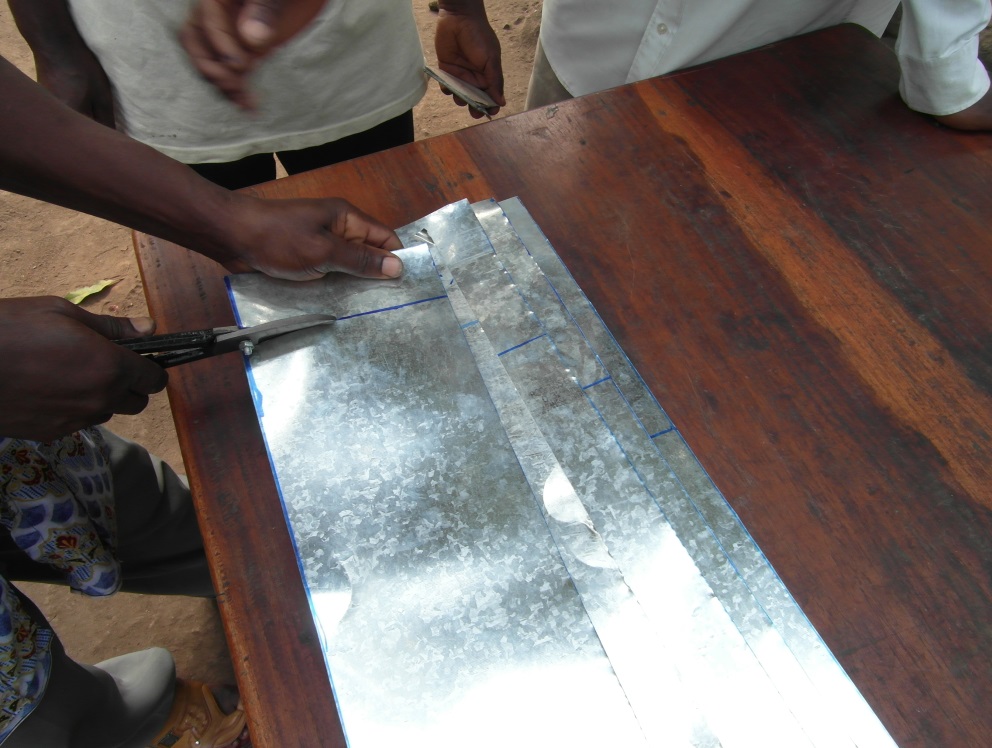
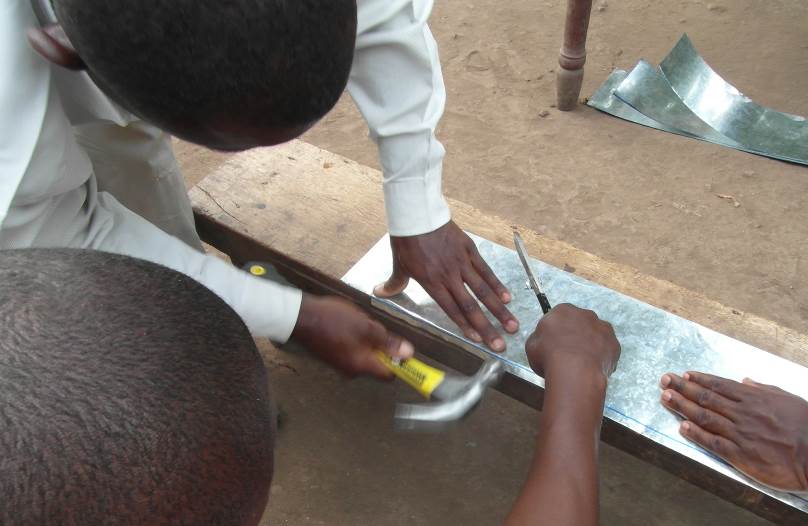
Mark and cut 44 inches of length from the metal roll, taking care to make sure the line is an exact right-angle to the side of the sheet.
Use the hammer to flatten out any dents along the edges of the sheet. Draw large arrows on both sides of the sheet pointing to the long edges of the sheet. This is to identify the straightest edges.
Accurately mark half the width of the roll (min 19 inches). Make sure you draw a straight line to cut along. You can use the edge of a roll of metal to give a straight line, then cut with tin snips.
Divide each half into three equal strips. Each strip should be between 6 and 7 inches wide. Use the edge you marked with an arrow to draw straight lines, then cut along the lines.
Mark and cut the strips to the following lengths: 44”, 42”, 40”, 38”, 36”, 34”. Lay one strip on top of the other to give you a right-angled line to mark and cut along.
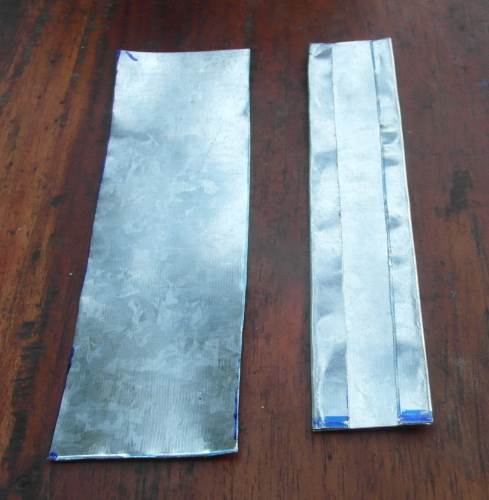
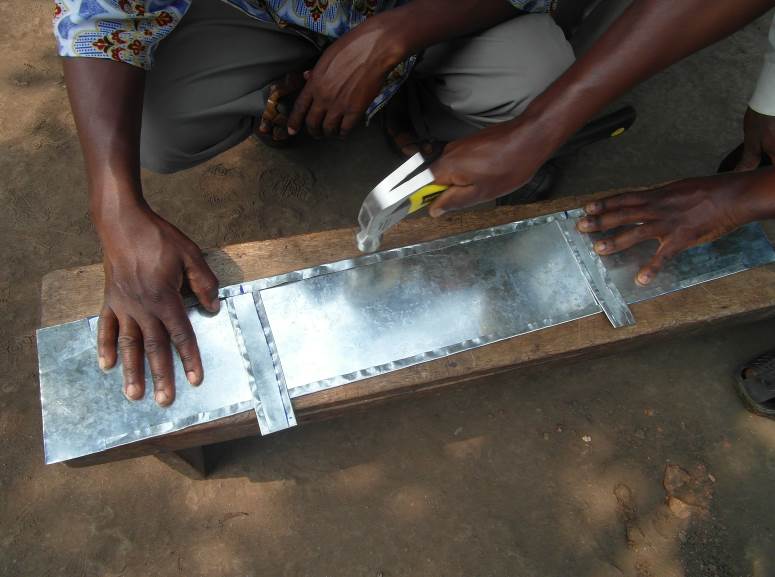
Cut the off-cuts into 12 strips 2” wide. Fold the edges of each strip over. These will make your handles.
You will fold the edges of the strips over to make them 5 ½ inches wide. Measure and mark one line on each strip so that the folds will be the same width. Use the edge you marked with an arrow to draw straight lines. Fold the opposite edge on the two strips marked with an arrow so you can still use the straight edges for drawing.
Cut 2” of the fold off at each end, then fold over the remainder using the hammer. Folding is most easily done over the edge of a straight piece of wood such as a bench, table or a straight plank.
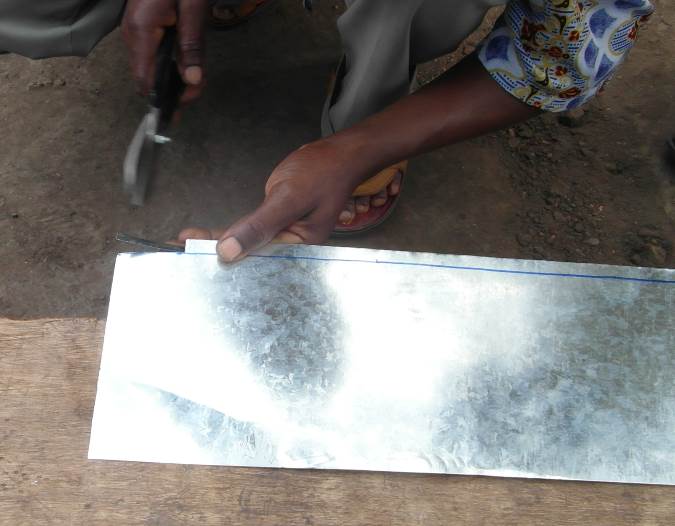
Mark the position of the handles at roughly equal distances from the ends of the strips. Put handle marks at the following distances apart for each strip:
Starting with the longest strip: 20.5”, 19.5”, 18.5”, 17.5”, 16.5”, 15.5”.
A quick way of doing this is to measure the length of the strip, take off 3 inches and then fold the measure in half and mark the two handle positions.
Now measure and mark 5 ½ inches width from your first fold. Cut the 2” strips from each end and fold the edge over, inserting the handle strips at the places you have marked. Make sure you fold the second edge on the same side and the first edge.
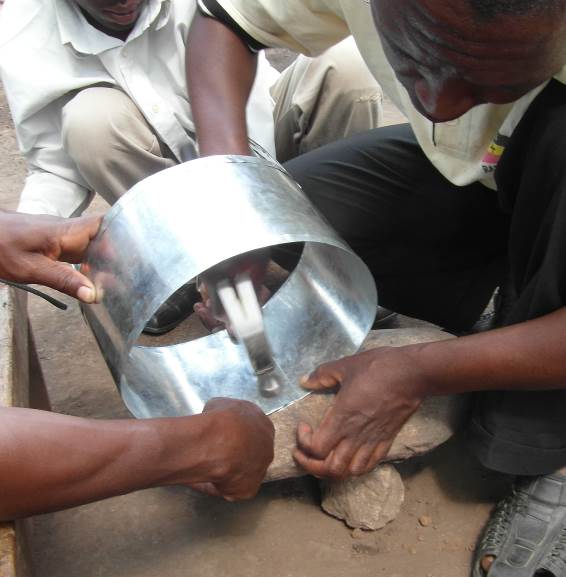
Fold the handles back and form them into loops, folding them round a stick about 1” diameter. Hammer a masonry nail through the folded joint, then enlarge with the wire-nail. Finally rivet using a short length of 3mm dia. aluminium or copper wire or a proper rivet.
Now fold 1” at each end of the strip in opposite directions so they interlock and hammer the joint flat. Rivet the joint near each edge to fix it.