04 Bio-Sand Filter Pot – Making Your Own Filter Pot
You can make your own filter pot at very little cost using skills that most people have and, apart from some cement and a piece of hose pipe, using the materials which you can dig up or collect from a nearby river or stream. The filter pot is made by plastering a mud mould with a mixture of sand and cement.

Materials required:
- 12 kg cement (1/4 bag , 9 litres, ½ large basin).
- 1m of garden hose.
Stones and sand from the ground, run-off, or river.
- Mud for making the mould.
- Basin or bucket to wash and measure sand.
Top Pot
A top pot makes a bio-sand filter easier to use, so we advise you to make a top pot at the same time as you make the filter pot. Follow the instructions below, but in addition use the largest ring to make a top-pot 13” across with a rounded bottom, no more than 10” high.
Making the Mould
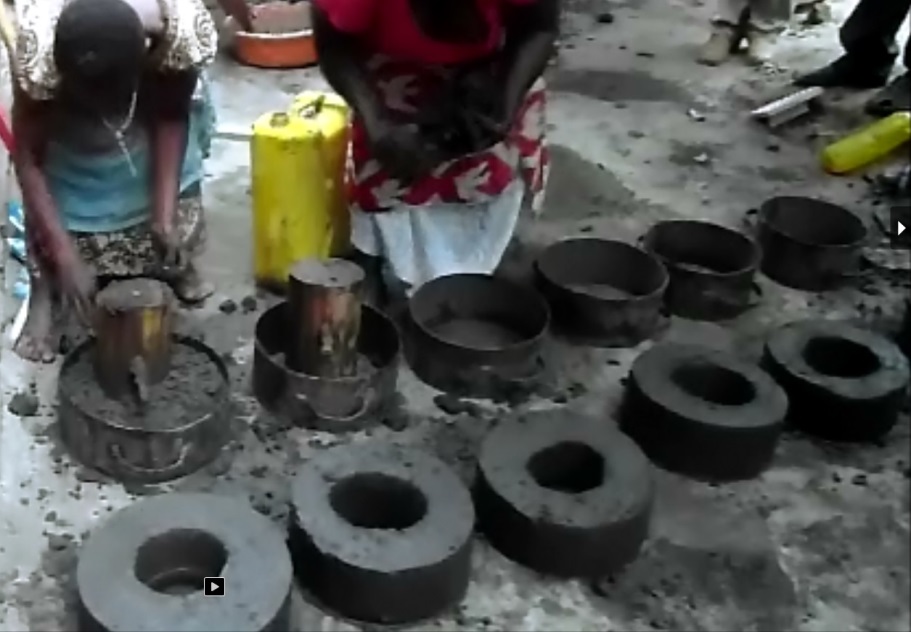
You need a basin for washing the sand, and a circular object between 3 and 5 inches in diameter and at least 6 inches tall for creating the hole in the mud rings. (E.g. a glass jar, large plastic bottle, or a piece of wood or plant stem.)
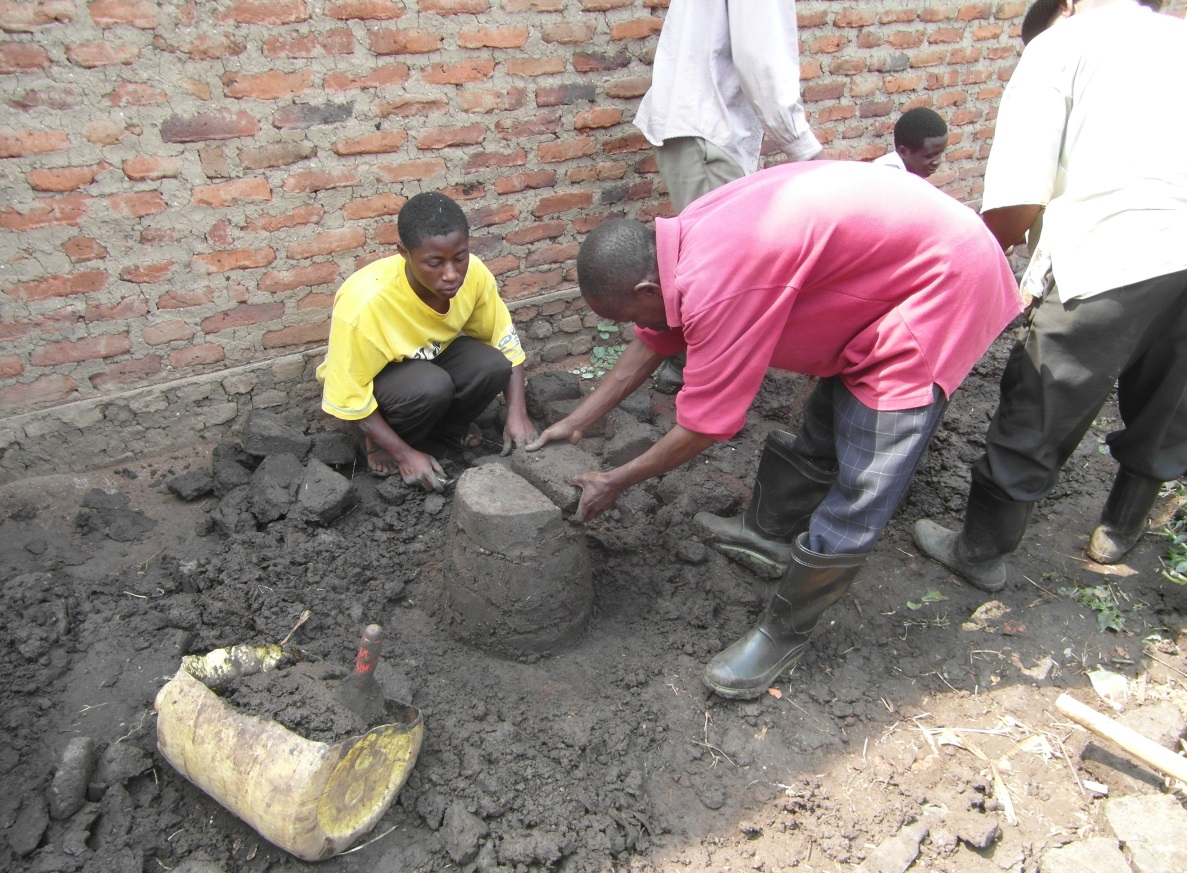
The first step is to make some sun-dried mud rings which you will stack up to make the mould.
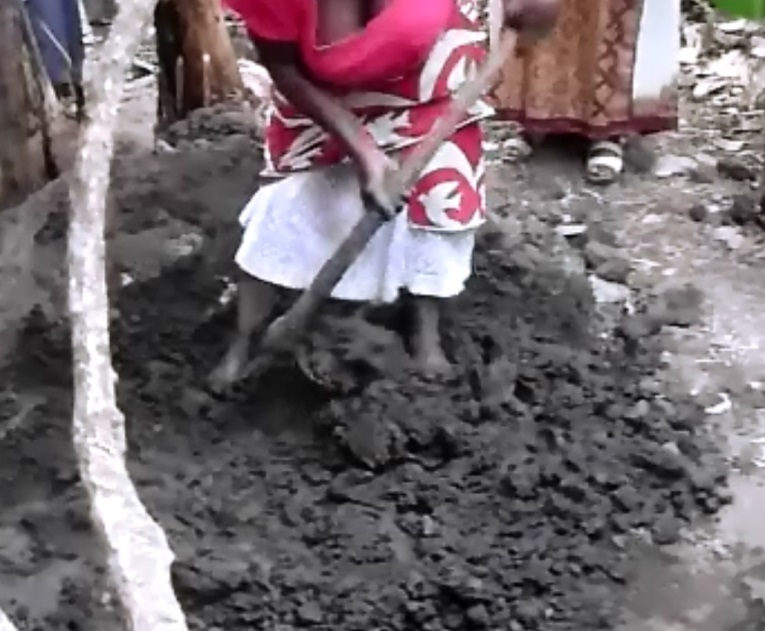
Dig a small pit in a patch of ground suitable for making mud and mix in water to make very thick mud, just as you would to make mud bricks.
Using the moulding rings or by hand, make 6 circular mud rings each 5 1/2 inches tall with diameters of 13”, 12½ ”, 12”, 11”, 10½”, 10”. The mud must be packed hard with a level top. All except the smallest ring should have a hole in the middle about 4” across. This can be made with a glass bottle or jar, large plastic bottle filled with sand, or a piece of wood or large plant stem. A banana stem with a stick pushed across it for a handle is ideal. The hole in the ring is simply to make removing the mould easier. The object making the hole should be removed when the ring has been made so it can be used to make the next ring.
Remove the moulding ring and leave the mud rings for 4-5 days until dry.
While the rings dry, collect and wash the sand you will require (See instructions later).
When the rings are dry, prepare an area of ground where you will make the pot. It should be flat and cleared of all leaves and debris. If you have some polythene or an old sack, lay it on the ground, or else use large leaves, to make a clear area about 18 inches across.
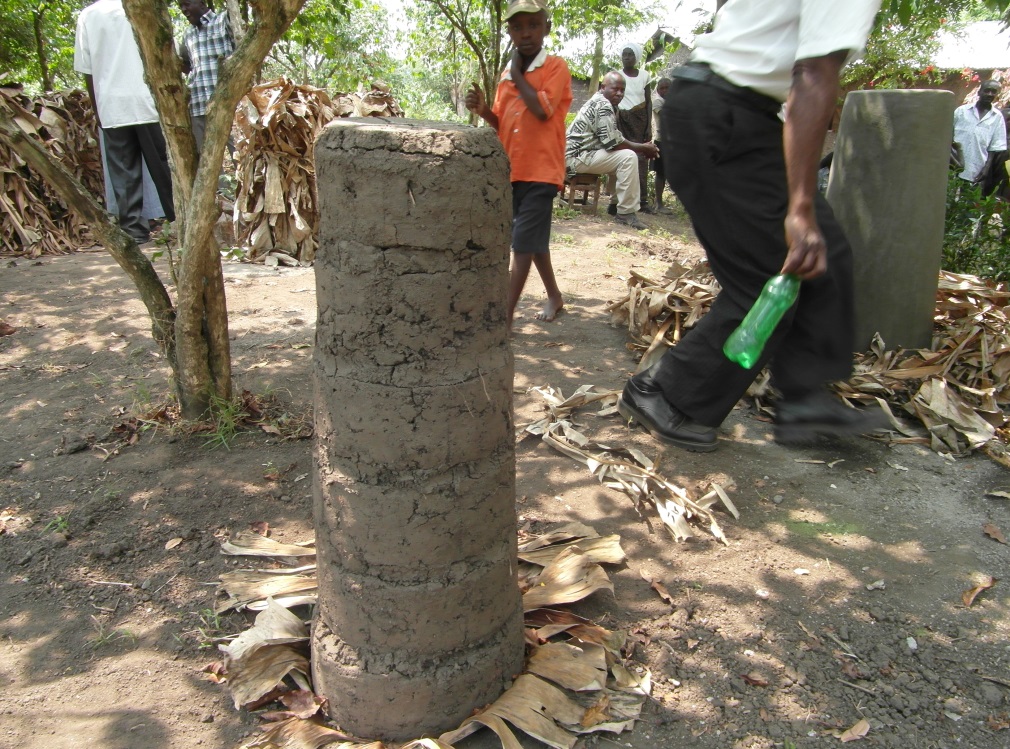
Stack the rings on top of each other with the largest at the bottom. If the rings are not dry enough, the mould will collapse. Use mud in between the rings to make sure the stack is not leaning over. The top of the mould should be 33 inches above the ground.
Make any required repairs with mud and leave to dry. The surface of the mud should be smoothed by rubbing with a wet plastic bag or wet rubber glove. Make sure the mould is upright and has a flat top. Make sure the bottom of the mould is straight and smooth where it meets the ground.
The circumference at ground level should be no more than 45 inches. At the top of the mould the circumference should be 30-33 inches. The height should be 33 inches.


Locating suitable sand
You need to find sand which is free of clay. It should be “sharp” i.e. with rough grains of sand, ranging from fine up to passion fruit seed size. Some sand is very fine, almost like flour, with smooth grains. The sand must have a mix of grain sizes. Without fine sand the pot will be porous. Without course sand the pot will crack.
Sand can be found in quarries, rivers, water gullies or by digging in the ground. If using river sand, it is better to use sand from the banks rather than from the river bed. When digging for sand dig below the top-soil to avoid organic material. If the top soil is clay, you can often find sand by digging deeper.
To test the sand quality, wet some sand in your hand then try to rub it into a ball. If it feels soapy it has clay in it. Rinse the sand off with water. If it leaves your hands dirty with sticky mud it has clay in it. Any clay will have to be washed out.
Washing the sand
You need to gather 2 large basins of sand to plaster the mud mould. The sand should be taken to a river or other water supply to facilitate washing. You can use water from any source, as long as it is at least as clear as lemon-juice and not salty.
The sand must be thoroughly washed to remove any clay, silt or organic matter. These will cause the mortar to be weak and porous. It is best to wash the sand in small batches – about two big handfuls at a time. Thoroughly mix the sand with plenty of water until the water is muddy, then drain off the water and repeat until the water is like lemon juice.
After washing, pile the sand up on a clean surface to drain. Cover the sand to keep it clean and to stop animals using it as a toilet.
Plastering the Mould
You will need a wooden float (a flat piece of wood with a handle), a metal trowel and a plastic bag.
When the mould is dry enough (after 1-2 days) you are ready to plaster it with mortar. If the mould is too damp the mortar will fall off.
Mixing the mortar
You must not mix more mortar than you can use in ½ hour. The plastering needs to be done in three stages, so only mix 1/3 of the mortar at a time. If the sand is completely dry you can mix all the sand and cement but only add water to 1/3 of the mix. If the sand is at all damp, you must not add the cement until you are ready to use it.
You need 12 kg cement (1/4 bag , 9 litres, ½ large basin). The cement must be fresh and kept dry. Do not use cement that more than 2 months old or that has got damp or has hard lumps in it. If you use bad cement the pot will break and all your work will be wasted.
Keep back 4 cupfuls of cement and mix about a 1/3 of the rest in the ratio of 1 part cement to 3 parts of sand using a basin or cooking pot to measure. This must be done accurately. Do not guess. Mix it thoroughly before adding the water.
Add clean water (it must not be salty), a little at a time, to make a stiff mix which sticks together, but does not bring water to the surface when you pat it with a flat object. It is very easy to add too much water.
CAUTION: IT IS VERY EASY TO ADD TOO MUCH WATER. ADD IT A LITTLE AT A TIME. ALWAYS ADD LESS THAN YOU THINK YOU REQUIRE.
The aim is for a mix that is wet enough to stick together, but stiff enough to stick to the mould without sliding down or falling off.
Plastering the mould
- Before plastering, check the bottom of the mould goes straight down to the ground.
- Clean the area round the bottom of the mould. You need to be able to pick up and re-use any mortar which drops as you are plastering.
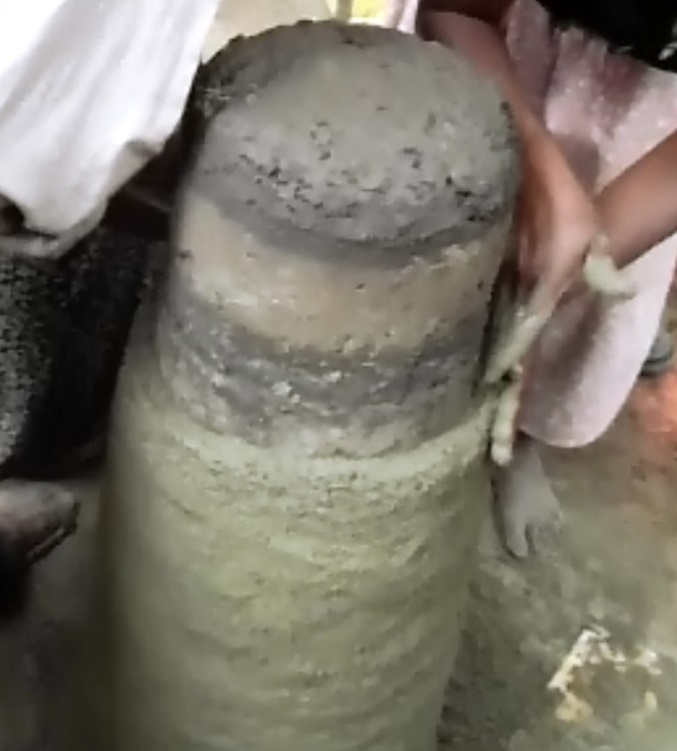
- Starting at the bottom, press mortar between your cupped hand and the mould, creating an even coat of mortar over the bottom 1/3 of the mould – no more than ½ inch thick. It is important to pack the mortar very well to ensure the pot is strong and water tight.
- Do not let the mortar layer get too thick, because you need to plaster the entire mould with your mix.
- When you have used up the 1/3 mix, leave the mortar to get firm for about 1 hour. Then continue in the same way with the second and then the final 1/3 mix, covering the entire mould. Fill any dents with the last of the mortar, rubbing the sides with a straight stick to ensure they are straight.
- After 1 hour rub the mortar smooth with the wooden float.
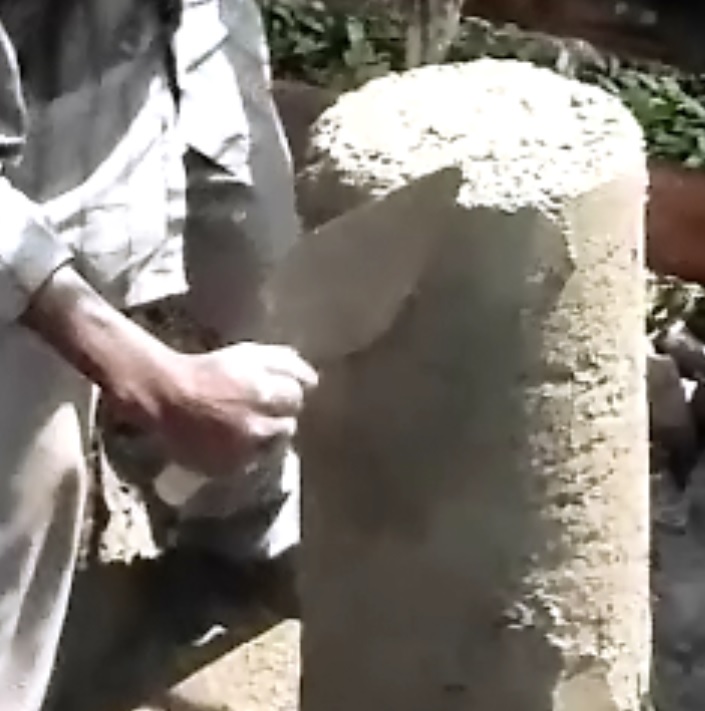
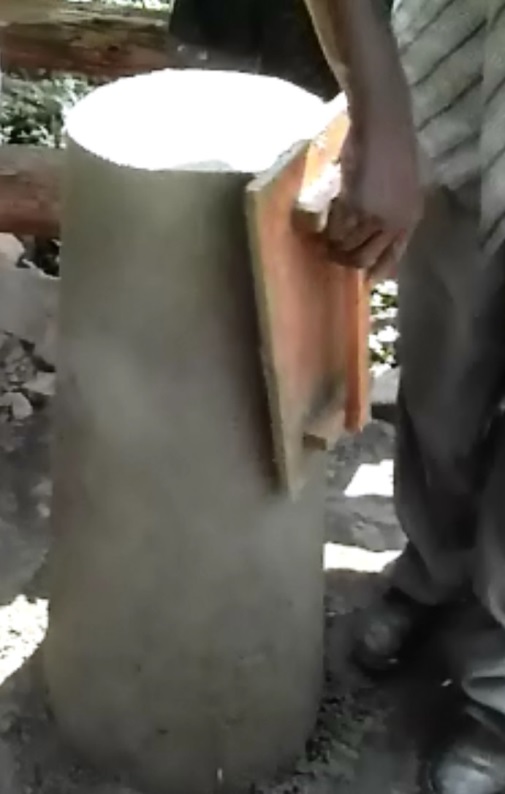
- After ½ hour, mix the 4 cupfuls of cement you kept back with water to make a creamy slurry. Trowel this on with a metal trowel. As this gets firm (about 15 mins) trowel smooth, taking care to ensure all tiny holes are filled. Then finish by dragging a wetted plastic bag up the pot and round the corner of the base. Inspect the pot carefully and fill any visible pin-holes.
- Lastly carefully twist/push in a stick for the hose hole 25 inches below the top of the plastered mould. The stick must be a tiny bit smaller than the hose, so that you can force the hose through the hole when the mortar has set.
- After an hour or so, when the mortar is firm, cover it with a big sack or large leaves to protect it from the sun and the wind.
Curing the pot
The pot must be dried slowly over the first 7 days by keeping it protected from the sun and wind and soaking the pot every morning, mid-day and evening. If you do not keep the pot damp for the first week it will crack. After a week the pot must be left covered for a second week to dry out slowly. The pot will not gain its full strength until 1 month after it was made but it should be strong enough to empty of its mud and carry to its intended location after 2 weeks.
Testing the Pot
Before moving the pot to the house, fill it with water and leave it for a day or two to make sure there are no leaks. Repair any leaks with cement/water paste.
Installing the hose
A length of hose pipe about 3 feet long is required. It should be pushed through the hole in the side of the pot from the inside so that there is about 6 inches of hose outside the pot. The bottom of the hose must rest on the bottom of the pot. The hole for the hose must be water-tight. The hole can be sealed with cement paste, putty or chewing gum.